
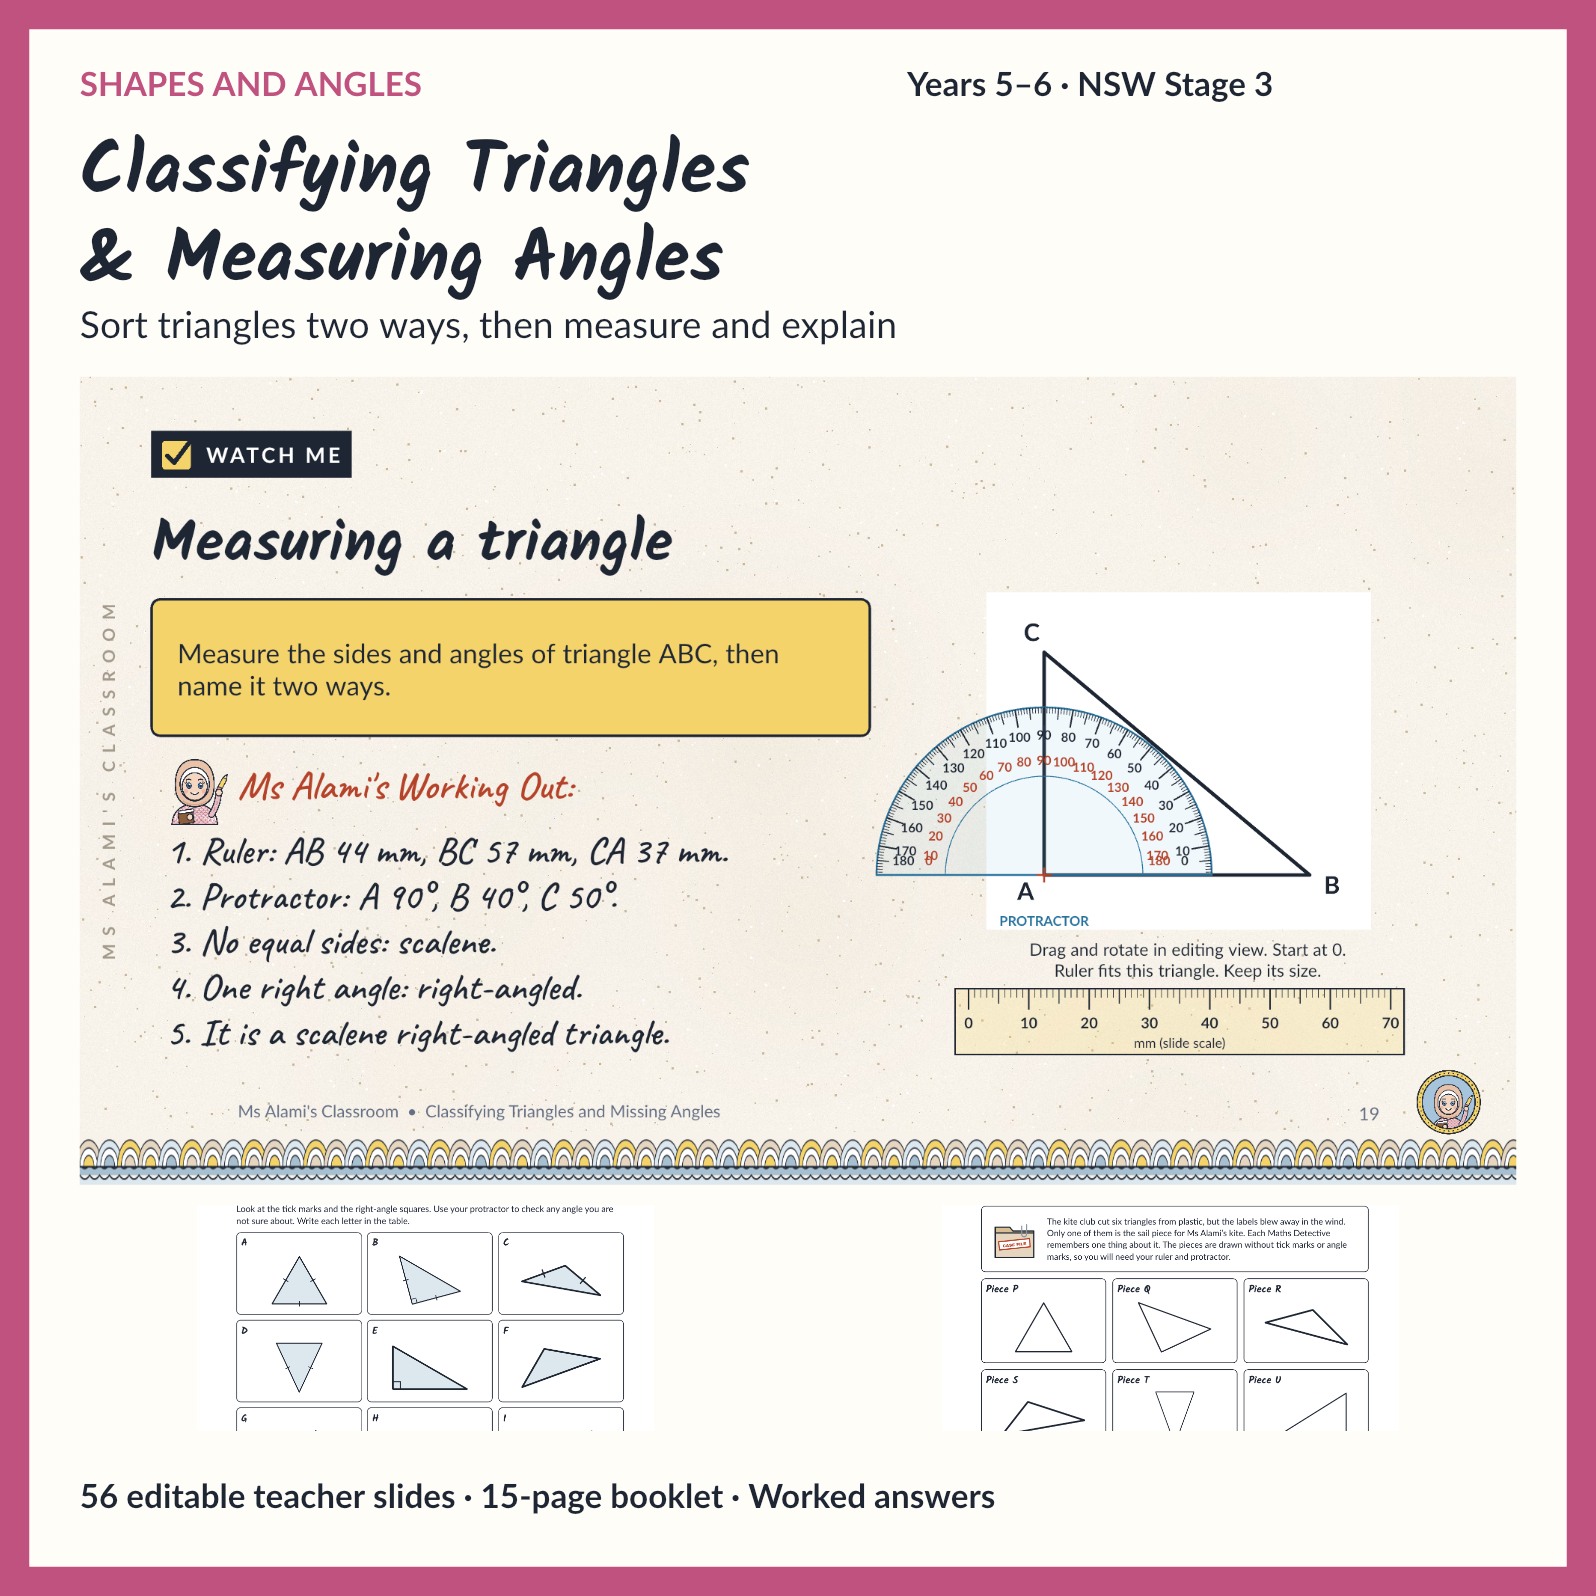
When a student calls a shape a right-angled triangle, ask a second question: “What can you say about its sides?” Triangle classification becomes clearer when students recognise that each triangle can have a name based on its sides and another based on its angles.
Sort triangles in two ways
Begin with side lengths: equilateral triangles have three equal sides, isosceles triangles have two equal sides in this pack’s classification, and scalene triangles have no equal sides. Then classify by angles: acute-angled, right-angled or obtuse-angled.
Use triangles facing different directions so students look for properties rather than familiar silhouettes. Side tick marks show equal lengths, and a small square identifies a right angle. A scalene triangle can also be right-angled. An isosceles triangle can be acute-angled, right-angled or obtuse-angled.
A sorting table helps students connect the two systems. Ask why an equilateral triangle cannot be right-angled or obtuse-angled. All three of its angles are 60°.
Model measurement before independent practice
For a ruler, align the zero tick with the vertex, then line up the measuring edge with the side. For a protractor, place the centre on the vertex, align the baseline with one arm and start with the scale whose zero sits on that arm.
The Classifying Triangles lesson pack includes a movable grouped ruler and transparent protractor on teacher slide 19. A teacher or student can drag and rotate each tool in PowerPoint’s editing view while the slide is projected. Standard slideshow mode does not allow dragging these objects.
The ruler is calibrated specifically to triangle ABC on that slide. Keep the ruler and triangle at their original sizes. Its millimetre readings represent the worksheet diagram, not physical millimetres on the screen. The protractor can be copied to other diagrams while keeping its proportions.
For the printed measuring activity, use A4 actual-size printing. A “fit to page” setting can change the diagram’s side lengths.
Investigate the three angles
Students measure and record the angles of different triangles, then compare their totals. They can also cut the corners from a paper triangle and place their points together on a straight line. The investigation gives them a concrete way to discuss the 180° total.
Separate that measurement investigation from the optional calculation extension. In this pack, calculating missing triangle angles is clearly labelled Extension (Stage 4). For an example in that extension, a triangle with known angles of 48° and 67° has a missing angle of 180° − 48° − 67° = 65°. Checking 48° + 67° + 65° gives 180°.
Use properties to solve a problem
The Missing Sail Piece case file gives students clues about a triangle’s sides and angles. They eliminate candidates and explain their choice. The kite activity then connects classification and measurement with a materials budget.
Classifying Triangles and Missing Angles includes 56 editable teacher slides, a 15-page student booklet, colour and black & white PDFs, editable booklets, worked answers and the measuring tools. Its classification and measurement work supports NSW Stage 3 MA3-2DS-01 and MA3-GM-03, with the extension identified separately.
If students need more help choosing the correct protractor scale, start with types of angles and measuring angles. Then connect the geometry work to translation, reflection and rotation.